Tuesday, November 28, 2017

No More Judder !!!!!

19500 miles. -
forks rebuilt, reworked , and massaged a couple times but damnit if there still isn't something wrong. Judder was the only thing i could think to describe it  JUDDER - a vibration between 2 surfaces causing a vibration in a single direction.   after some thought  I decide to pull the front apart and look to see the condition of the steering head bearings. Wholly molly  the front was a littly muddy but i have to wonder if any grease was ever added to these bearings ? both top and bottom were dry.


I was kinda disappointed with this. So Should I install new balls ? or Tapered rollers. After thinking back to earlier installs in previous bikes and the bennefits I decided on the tapered rollers


new bearings installed. Guess what ? No More judder steering smooth as butter !!!!  crazy 3 year old bike with just 20k miles needs new steering bearings...... say la V  on to next project.

FORK update

last update was a refresh of the forks. I tried to document with photos as I went along. shortly after the reassembly i had a couple thoughts of details I forgot to document. First was internal diameter of the valve shims. -  8MM

After a test ride I was still unhappy with the compression. My first thought was to reshim,Guessing based on the already factory installed shim. after a couple days of brewing on this I thought back to an accidental documentaion of a photo I took of the compression valve and its shims.

How does this valve allow any flow at all ? The Base is torqued down with a couple shims to allow minimuim flex. This is where cause for reason meets the old saying " cant get worse than this" 
refrencing the rebound valve i measured out the spacing and delivered to my local machine shop to have the base machined down to allow more flow. 


Before and after. about 10mm machined down to allow the shims to actually flex and flow. but why stop there. The Dr. was already. I noticed the flow out of the compression valve adjuster was minimal so i machined it out a bit to also allow more flow. 


The flow out of the Compression adjustment valve is minimal and flows around the fork internal cartridge so I cut out a little slot to allow more flow. Maybe a fraction but it gives a wider range of adjustment. All in worth the effort. The forks are still firm but way more compliant. What can you really expect from a couple inches of travel.  Seriously though the suspension travel feels more balanced than ever. though the front still had a small suspension travel judder that I couldn't explain after taking the forks back apart. damn the judder was bugging me. Was it something in the fork I missed. ....... ? I rode it for about a month before I realized it want the forks. ---- next post 
I also Added a new preload spacer that would allow me to pull the cap without using a compressor !!! 


Tuesday, September 26, 2017

Marzocchi SF 848 forks disassembled

I pulled the forks apart last night to figure out if in fact I can service them or make any valve adjustments. 

I disassembled them down to the shims, (photos bellow,) cleaned everything and reassembled. fresh fork oil topped off but after a test ride I can tell I need to remove some off the top. 


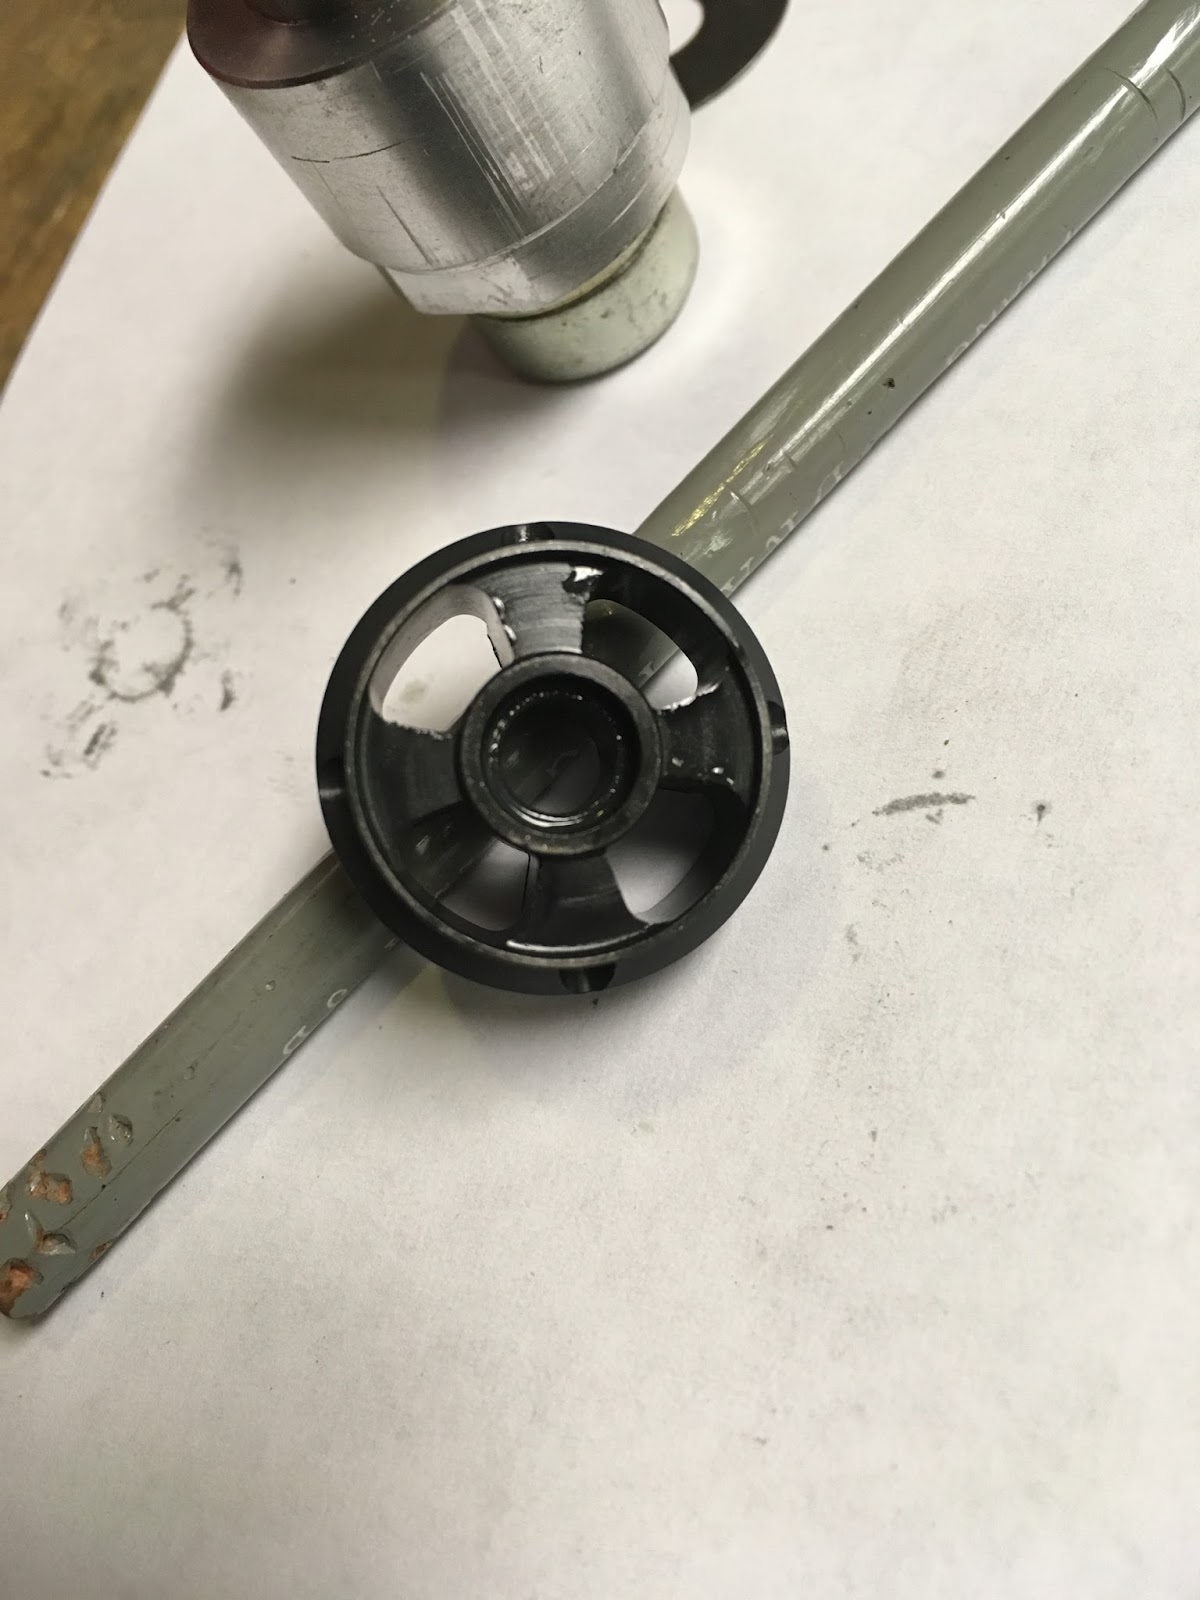
all shims have inner diameter of 8mm and will be shown as width x thickness 
Starting with the compression Valve - 
Compression -23x.1 / 22x.1 / 21x.1 / 20x.1 / 17x.1 / 15x.15 
check valve shim - 23x.315 

(forgot to take a photo with shims before i reassembled it) 


 Rebound shims also hav inner dimeter of 8mm and will follow same width x thickness. Rebound- 23x.1 / 23x.1 / 20x.1 / 20x.1 /19x.1 / 17x.1 / 15x.2 / 11x.25Check valve shims- 22x.1 / 22x.1 / 18x.1 / 22x2.0 -( this is a thicker tapered shim )
 

Lastly the compression Adjuster and the top out spring. I did notice while the cartridge was out, at the top of the fork tube is a thick 20mm tall rubber bumper that probably assist the top out spring.
 The forks come from marzocchi with the spring sitting on top of the preload spacer. The first couple time I did this I replaced it like this. I did notice it was very noisy and the spring did a lot of flexing. this time around I placed the spring in first with a  home made ABS adaptr to keep the new preload  spacer aligned on top of the spring ( I didnt use the spacer on the left in the photo below) .  the guide added 6mm of preload with a spacer of 113 mm and a 2mm washer. A total of 121 mm of preload. The sping is an .85 kg from racetech. (270mm in length). Before adding the springs I filled the forks to 108 mm (from top of fork) with Motul Expert light 5w . After I reassembled i took it out for a ride and found that I need to pull some more oil out. I measured the height before i disassembled and it was all the way down to 280 mm. Not sure I'll make it that low next round , but it does need a reduction. 


mileage -18,980 
      I pulled 100cc out of each fork this morning.  Based on a couple volume calculators , using a 50mm for fork width  i came up with about 20cc per 1cm. so I'm estimating about I pulled out about 50mm of fluid. height, Dropping my oil height to around 160mm - out for a test ride. Current damping is - 
compression - all the way out / No damping adjustment. 
rebound - L- 1turn out / R 1/2 turn out 


Sunday, September 17, 2017

New Shock milage is 18765

Installed the New Ohlins Shock out back. I purchased it used from a Ducati.ms member and sent it straight DAN Kyle for an inspection. All turned out good and he also Machined the preload adjusting nut to allow the Nut to thread all the way up. This in turn allows for optimal sag settings. I also removed the ride height adjuster. on of the eyebolts had nearly siezed up but I managed to break it loose with no damage. I retaped the threads to ensure everything was clean of debris and the greased them with some atiseise to help prevent a future siezure.  The "new"to me Ohlins shock is a pain in the arse to adjust rebound. worse than the sachs. But once I got it dialed in it feels great. I still want to revalve and respring the front end. maybe i'll get to it this fall. undecided if i would send it up to Dan or attempt it myself. I think I could do an ok job. I'"d have to purchase some tools and parts to complete the job. this would be a great experience but would cost the same to ship them up the cost and back.... Still unundecided.. any way here are the photos. I cant Find an exact milage but I dont think I've been very active lately Current milage is 18765


catching up on missed posts. 15195 Miles service

Its been a while since I've made some updates to this post and looking back I realized that Ive forgotten to update some important information. First would be the 15,000 mile service. Though I'm posting on sept 17 2017 the service was actually completed at Pro Italia on August 27, 2016. I'm posting up a photo as a reminder. All the valves were still within spec. I'm not surprised . I'm not racing this machine. It spends most of its life commuting back and forth to work. living below the 7krpm range.


Tuesday, November 29, 2016

Milage 16400
_ New Dunlop Q3 Rear.
_ checked Rear Brake pads-  2mm -change @ 1or below ( new is about 4 mm)

**Need to replace warped front rotor.

Tuesday, April 26, 2016